Sunday, December 11, 2011

Book 9: The Little Fir Tree (& a little math!)

If you are looking for another touching Christmas story to share with your kids, look no further than The Little Fir Tree, by Margaret Wise Brown.  


This story brought tears to my eyes as I was reading it to my class!  A little fir tree is all alone in a meadow.  One winter day, a man comes and digs him up, roots and all, and re-plants him in a box to be the Christmas tree for a little boy who cannot get out of his bed.  Each year, after Christmas, the man returns the fir tree to the forest.  I won't spoil the ending for you, but this book is a keeper!

When we were done reading, we made pine cone tree ornaments as gifts for the parents this year.  (I like to make several gifts, and let children choose which to give to their parents.  It helps those with blended families and the like.)   I am not the creator of this project.  I discovered it through Pinterest.  The original can be found here.

Pine Cone Christmas Trees:


The easy steps:

(1)  I mixed some tempera to be a lighter green by adding white.
(2)  Students have fun painting the entire pine cone green.
(3)  When paint is mostly dry (but maybe not all the way) have students use bottle glue to decorate the edges of each section of pine cone (Not sure what those sections are called!).
(4)  Students choose a glitter color, and glitter away!


(5)  Students painted a wooden star with yellow tempera
The next two steps are best done by the teacher, using a hot glue gun:

(6)  Glue on some gold ribbon

Glue the star on top of the ribbon.


These turned out so cute, I had my own two kiddos come back to school with me at night so we could make a couple for our own tree!  It's great when you can get double-duty out of a project!

We also learned how to do +/- 10 math problems on Friday!  If you haven't been to Teacher Tipster yet, you should.  He has an awesome idea about brain chains.  I added these into my classroom this year, and I really do think they made a difference!  I'll include the video here, to make it easy to find:


I bought a bunch of shoe laces, parents donated the beads, and we have been using the brain chain as part of our calendar routine all year.  I added in brain chains for the students on Friday.  We practiced building numbers, and then I took his brain chain worksheet (which is no longer on his site, I guess?)  and added it into my own to create the one below:

10 With Brain Chains

He is right.  The brain chains are a very effective tool!  My students were able to demonstrate their knowledge of Place Value easily, and it provided a valuable "bridge" between recognizing place values and manipulating those place values.  Having something visible and tactile was a great help to some of my little strugglers, and I felt like most of the children understood the concept of adding or taking away 10s with very little one-on-one support.  Hooray for "Brain Chains"!

Saturday, December 10, 2011

Book 8: The Night Tree

Have you ever read this darling book by Eve Bunting?  My class just LOVED it, and so did I!  I thought it was a great addition to our theme of caring for others at Christmas time.  (And, by the way, I think the GRINCH was a great way to start this theme, if I do say so myself!  We've been able to talk about how he changed to care for others at Christmas.  If the Grinch can do it,  we can show care for others, too.  Even the animals!)


In this book, a family finds the same Christmas tree in the forest every year, and decorates it with food for animals:  popcorn wreaths, apples, oranges, and some ornaments made out of millet, honey, and nuts.  The family celebrates outside, then go home, where the little boy imagines all of the animals that might be eating from the tree.  It was a charming story, and I'm so glad I read it!  

We followed up the story with my favorite kind of craft -  the ones that take 15 minutes or less!  I got this idea from another blog somewhere, but I can't find it now to give the owner of the idea credit.  Anyhow, I wanted to make an ornament that students could put outside to feed animals.  We have all made the fun pine cones with peanut butter and birdseed, but now with all of the nut allergies in school, that is not a good idea.

So, we made cheerio ornaments (which my husband assured me are perfectly safe for birds and squirrels to eat),  out of cheerios strung on pipe cleaner.  It can't get much easier than that!  Since they were for animals, we didn't even add any ribbon.  The kids shaped the ornaments in whatever shape they liked, added cheerios, twisted, and voila! 


I told the kids to find a tree somewhere to hang the ornaments.  Some kids came in on Friday all excited..."Some animals have already eaten some of my cheerios!"  So sweet.

Wednesday, December 7, 2011

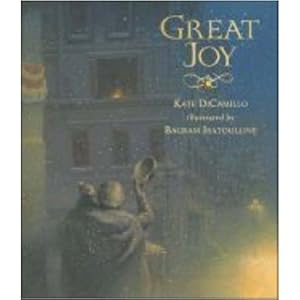
Book 7: Great Joy

Today, my students got to read the story Great Joy by Kate DiCamillo.  I just love all of her books, as I think she has such a way of getting to the heart of characters, and pointing out what is truly important in life.  (Some of my very favorites - The Incredible Journey of Edward Tulane, Because of Winn Dixie and The Tale of Despereaux.)  This short picture book was no different.  A girl named Frances has a hard time feeling the joy of Christmas until she is sure that the man on the corner is happy, too.  I thought it was a great book to talk about the joy of doing for others, and being kind to strangers.


I had to be absent in the afternoon, so my wonderful co-worker and friend, Mrs. Saunders, read this story to my class.  I can't wait to hear how the discussion went!

I plan on adding this story starter to my writing center tomorrow.  I usually laminate and hang them with a magnet from the metal writing center shelf. 

I want to do a service project with my class,  and I think this would be a great intro. to that.  During our class meeting on Friday, we are going to brainstorm random acts of kindness we can perform as a class, and choose one.  It will have to be small this year - something we can do for staff members or students. 

Some ideas I already have
  • surprise a class with a quarter for everyone on popcorn day
  • an anonymous letter to someone who works hard for us, letting them know how much we appreciate him/her
  • Sharpen a set of pencils for another teacher's classroom, and leave them ready to go for the next day (Wow, would I love getting that one!)

** I would like to plan ahead better, and do something bigger with next year's class.  My son's class makes fleece tie blankets every year as a gift to a shelter.  I love this idea because it is easy for kids, and useful to someone else.  Parents do have to donate the fleece, though.  I bought two yards at Walmart and it cost about $10.00.  It might be do-able with donations or doing a project to earn money. 


That's it for today's ideas! Do you have some more ideas, or better ideas for random acts of kindness in a school setting?  Things kids can do??  I would love to hear your ideas!

-Kendra

Tuesday, December 6, 2011

Book 6: The Christmas Wreath

So, speaking of the Grinch, as a teacher in December, don't you ever get just a little tired of the noise, Noise, NOISE?!  Please tell me I'm not the only one!  Today, my morning left me feeling slightly "grinchy."  But, with a little love (and some whole-brain teaching),  by afternoon my little darlings had returned, and we were able to have some fun with our next Christmas book -  The Christmas Wreath, by James Hoffman.


This is a sweet story that describes some exhausted elves (let's just say I could relate to the feeling) who are too tired to decorate a tree, or even to make a beautiful wreath.  They make a simple wreath for the door to Santa's workshop.  But, the wreath becomes beautiful when a Polar Bear finds it, gets it stuck on its head, and drags it through the water, forming beautiful icicles.  The wreath makes it back to Santa's door, and becomes a "Christmas Miracle" for the elves.  Another 27 thumbs up story!

I'm sure you know what we did next!  We made some simple Christmas wreaths as gifts for our parents!  I make this project every year.  It is simple, but pretty, and the kids get a chance to practice their patterning.  Here are some of my students' wreaths:


Many of them even tied their own bows this year!  It is very simple to make.  Here is one without the ribbon added yet.  The kids tucked the ends of the pipe cleaner under the beads:

Some of them figured out they could make heart-shaped wreaths:


I actually thought the heart-shaped wreaths were a great idea!  Most wanted keep them circular, but the joy of pipe cleaner is that they can change their minds whenever they like!  We put a piece of masking tape on these with our names, so we can sort them all when it is time to send home our Christmas gifts.  

Have fun keeping it simple!

Monday, December 5, 2011

Day 5: The Grinch

Today we unwrapped, and began a week's worth of activities with, Dr. Seuss' famous Christmas story - How the Grinch Stole Christmas.


 We read the first parts of the story, and reviewed our story elements:  characters, setting, problem.  Next, we read the middle and discussed the details of the story.   We completed the following worksheet as a class.  I guided the discussion with the overhead. We're old-school like that. ;-)


We didn't get a chance to finish the story, but we will do that tomorrow.  We will review what we have learned so far about the parts of a story, read the ending, and discuss how the problem was resolved.  We will continue the fun with the grinch all this week!  Some of our fun activities:

  • Grinch glue (green glue) for our spelling word practice.
  • "Make a Grinch smile" writing project.  We will write a class book of ways to make a Grinch smile, with illustrations.  I wanted to do an art project to go with it, but I think I'm doing enough art already this week!
  • Grinch word work centers from Babbling Abby.
  • I introduced a fun math game today for our math centers time.  We learned about the number line today, and counting up from the biggest number.  I wanted to create something that would allow students to practice counting up, and involve some "grinchy" fun, as well!   The instructions are included with the game below:


In keeping with our "Dr. Suess" theme for the week, our class gets to go to our local high school's production of Seussical, Jr. on Thursday!  It's close enough to walk, and with budget cuts, it will be our first 1st grade field trip in 3 years!  When I told the kids we were going on a field trip they were So excited!  I think I might be just as excited as they are. :-)

 *Update* - My students did such a cute job with their retellings, I had to post a few pictures.  (please pardon the low quality - I'm having trouble figuring out the flash when taking pictures of something white!):


 "he got to serve the roast beast."

 "His heart grew 3 sizes bigger and he liked Christmas."


"The Grinch wanted to ruin Christmas."

Sunday, December 4, 2011

Christmas Book 4- Christmas Mice!

On Friday, we unwrapped the adorable book, Mousekin's Christmas Eve, by Edna Miller.


This is an older book that I checked out from our school library.  The sweet little mouse in the story "loses" his home, and has to go searching for a new one.  He goes out into the cold, snowy night where he is uncomfortable and scared of predators.  He is surprised by the colored lights coming from a Christmas tree.  He sneaks into the warm house, climbs all over the Christmas tree, and finds a new cozy place to sleep inside the nativity scene.  I loved this book, because it was appropriate to read in the public school classroom, but also had a very strong message about finding peace and comfort at Christmas time.  I was kind of surprised, but my kiddos LOVED it!  27 thumbs up for this one!

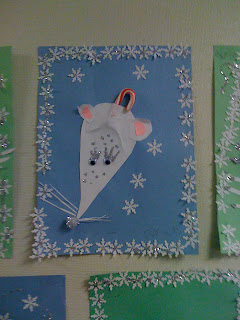
After reading, we made our own "mousekins" out of paper.  I saw a picture of this project on Flickr and pinned it to my pinterest.  Here are our version of the project, and the directions I came up with:


 You need:  construction paper backgrounds (I chose blue and green to represent more "wintery" scenes,  plain white sheets of paper per child,  one 1/2 sheet of white construction paper per child, two 2 1/4" white squares per child, two 1 1/4" white squares per child, scraps to make whiskers from, mini candy canes, pom-pom noses ( I used pink, red sparkly, and silver), google eyes, snowflake punch-outs (I bought the punch at Hobby Lobby - 40% off right now!), and silver glitter.

 1-  Teach your students how to draw a "tear-drop" shape for the mouse's body.  I had mine fold a plain white paper in half "hamburger style", start in a corner, and draw the teardrop.  We practiced four times.  I tried to emphasize making it wider at the bottom. 

2-  After practicing, we drew our "final" teardrop shape on a half sheet of white construction paper, and cut out.  (Cute that some of the mice look a little like rats because of their long shapes, but that's what makes this project so special!  It is 100% student work.)


3-  Glue the tear drop shape onto construction paper backgrounds.  I let my kids choose where to put it.  The paper could be vertical/horizontal.  I wanted it to be theirs, so I didn't make any rules.  Make sure students don't glue down the "bottom" of the rat, so they can slide a candy cane there.

4-  The hard part was the candy cane -  We unwrapped it and used bottle glue to glue it down.  Students did a LOT of counting.  We learned that we had to have patience.  If we moved it too much, it made our papers red and icky.  If we pulled on it to check if it was dry, it pulled out.  We had to just leave it and let time make it stick.

5-  Next, we made the ears.  We rounded out the squares of white and pink, glued them on halfway, and folded the ears up.  We left room for eyes and a nose.  (Some kids can't see this, and need help to keep from gluing the ears onto the nose.)

6-  Next, students glued on the google eyes and pom-pom noses.  (This was another lesson in patience.  If you pull up your pom-pom to check if it is sticking, it will not stick, and you lose all of your glue.)

7-  We used scraps of white paper to cut whiskers.  I really liked the thin whiskers in the picture above.  Most were a little thicker.  Again, everyone's were different.

8-  Next, students glued on the snowflake cut-outs made with my punch from Hobby Lobby.  I told them to make a "frame", but I also gave them license to do it their own way.
 

9-  We added glitter.  Students had a great time.  I gave an example of adding some to make eyelashes, and sparkle on the whiskers, and some in the snowflakes, and told them to use caution because too much and it might not be pretty anymore.  Some did a little more than that, but overall they turned out adorable!


It was a great way to spend a Friday morning, and I felt like the students had a chance to exercise their creativity, as well as patience!

Saturday, December 3, 2011

Christmas Stories & Activities

Hello Blog Friends!  I confess that I have been more of a blog-stalker than an actual blogger this school year.  I have been given 27 little kiddos this year, 10 of whom REALLY struggle, and 8 who are the highest in our grade level.  So, I have been having to slow down, and keep it simple.  Planning has been very time-consuming, trying to reach everyone's needs!

But, it is Christmas time, and I have to bring on the magic!  Christmas time is a great time to push kids a little further with such high interest activities that they don't even notice!  So, I decided to read 14 Christmas stories (one each day), and attach an activity to each.  I wrapped up each book, and we open one each day.   I thought I would share some of what I do with all of you, in case you find any inspirations.   (I copied Amazon links, but I don't have them attached to any affiliate link.)


DAY 1-  Gingerbread Man


We read the Gingerbread Man story, and filled out a graphic organizer on the wall.  I drew a large gingerbread house (not picture-worthy, as I am not the best artist!), and separated it into 3 sections.  We identified the setting and characters of the story and learned that the BEGINNING of a story defines the setting and characters.

We also read, this fun little book, and added it to our graphic organizer:


DAY 2-  Gingerbread Baby, by Jan Brett
We read the beginning of this story, as well, and added to our Gingerbread house organizer.  We discussed who the characters and setting were.   

Then, we began the awesome Gingerbread Science experiment from Babbling Abby.   We filled out the first part, added the gingerbread man to water, and waited.

While we were waiting, we read a Gingerbread man big book.  On the page where the fox eats the gingerbread man, I covered up his picture with white paper, and a note fell out from the gingerbread man!  We had to chase him around the school!  I will include the link here with my gingerbread man poems.  I have them from back when I taught kinder, and I am not sure where the words came from.  I have a feeling, I'm not the original creator, though.  You can edit them for your own use!
Gingerbread Man


When we came back to class, my coworker had left gingerbread cookies for everyone with a note from the gingerbread man in our reading area.  In addition, she uncovered his picture in the book.  It was the cutest thing!  One little boy was just ecstatic, saying "He's real!  He's real!  Do you know what this means?  The gingerbread man is real!"  It made it SO worth the time it took to bake all of the cookies and plan the activity.

We all took just one bite of the gingerbread man, and graphed the part we ate first (apparently we all liked to eat right legs and heads).

Next, we examined our gingerbread man science and completed the worksheet.

It was a wonderful afternoon!

DAY 3-

We completed the Gingerbread Baby story.   First, we reviewed the beginning, by filling out the beginning of a story map together.   Next, we completed the story, and discussed what the big problem was in the story.  We talked about how we often learn the problem in the beginning of a story as well.   Here is the organizer we used.  We drew pictures where there are no lines to write.  (It might not look right online, but if you select "download" it will look the way it is supposed to.)

Gingerbread Man for Retelling Unit


We completed the day by reading Ginberbread Friends together.  The kids just love these stories, and cheer afterward!

Saturday, September 10, 2011

My Room and Some Stuff to Share

I have been wanting to post pictures of my room for a couple of weeks.  But, I just had too much work for my class to get on here and post anything.  Now that I am *kind of* where I need to be, I thought I'd take a few minutes and share some of this summer's work with some classroom photos. (Sorry, I know they're not the best quality.  I used my iPhone.)   Let me know what you think in the comments, if you would! :-)

My door:


I didn't take many whole-room shots this year.  Not sure why.  Here is the closest thing I have:


My "Celebrity of the Week" board.  I have started decorating it with my items in this picture, but it is only halfway complete:


My Math Corner:


My number posters (at the top) are available for purchase in my Teachers' Notebook store for only 99 cents.  I think they are awesome for helping students with place value  (if I do say so myself!).

The Calendar Board:


If you like my weather cards, you can download them for FREE from my Teacher's Notebook shop.  Just print them out, mount on cardstock, laminate, and cut out.  I hole punched mine at the top and put them on a ring.  It just hangs on a normal push-pin.  The students love choosing the correct weather card.  Then they read a sentence (you can kind of see it in the picture).  It says "Today's weather is:" and the students insert "sunny" (which is all we have had here since school started.).  I hope you enjoy these with your kiddos, too!

I made the colorful pockets out of card stock and just stapled them together and onto the board.  I painted wooden stars and glued them to tongue depressors for "today, tomorrow, and yesterday" and used scrap-booking stickers for the words on both the stars and the pockets.  Maybe I'll get a better picture today so you can see it better!

My lunch count/attendance:


 I use electrical tape, shrinky dink magnets, and the side of my file cabinet!  So easy!


New idea for this year's library corner:

My new peg board writing center.  I personally love it!


Sweet - Top 10 Rating!

I also found this weekend that...

Thanks SO much to Leslie from Jack of All Trades who included my blog in her top 10!  I have enjoyed reading Leslie's blog since it started.  She's awesome, and I am honored that she has found my blog inspiring. :-)

I just handed out Versatile Blogger Awards today and don't want to overload my blog, but look for my Top 10 coming soon!  (Some are so amazing I almost don't want anyone else to know about them. Ha!)

So excited... my First Award!

I have been absent from Blogland for the past two weeks, and VERY present in my classroom.  School has started and is in full swing now.  Imagine my surprise when I finally checked my blog yesterday, and saw that Mrs. Wyand over at Keeping it True in K-1-2 left me a comment, and has awarded me with my very first blog award! I ran around telling everyone who would listen (maybe I'm not modest enough...), and now I get to post about it!  It's the Versatile Blogger Award.  

Here are the rules:

 The Rules after accepting the Versatile Blogger Award are:
  • Thank the person who gave you the award and link back to them in your post.
  • Share 7 things about yourself
  • Pass this award along to 15 recently discovered blogs. 
Thanks Mrs. Wyand!!
7 things about me:
  1. I don't watch T.V. except for the occasional PBS cartoon with my boys.
  2. I do, however, watch certain shows on Netflix, and I get so addicted I watch the entire series in only a few weeks.  My loves:  Grey's Anatomy, Glee, and Merlin (the current one).
  3. I am also addicted to chocolate - only the real stuff. I dream of DARK chocolate cakes and brownies.  
  4. I know how to make old-fashioned ice cream sodas, milkshakes, etc. as I used to work in an old-fashioned ice cream parlor.  
  5. I am a listmaker - I have a list for everything!
  6. I love writing my family's menu each week, and trying out new recipes I find on blogs.
  7. I enjoy children's books and young adult novels more than books written for grown-ups.  
15 blogs I've recently found: 
1. Shenanigans in 2nd Grade (Very creative teacher!) 
3. Counting Coconuts  (Montessori-inspired activities for preschoolers!  I heart this website so much!)
5. Miss O's Library Land  (Great idea for a blog, and great place to find new books for kids)
7. Pencils, Glue, and Tying Shoes  (Wow!  I haven't checked this one in a month or so and she has tons of cute stuff up -- some of my same ideas, too.  Great minds think alike! Ha!)
13.First Grade to the Core  (I linked up to a GREAT idea!  Buying my brain today! ;-)  )
15. Tickled Pink  (New one for me -- I need to explore it more!)

Thanks so much for reading my blog! :)

Tuesday, August 16, 2011

My Little Projects

I have just 12 days until students arrive in my classroom!  12 days!  Waaahhh!  I want to pretend like it's not happening, and go have fun with my little boys!  

But, alas... I have been diligently focusing on my classroom for last few days.  I am either at school, or at home thinking and planning about school.  I've also stayed up WAY too late working on little projects.  I thought you might like to see a few of the little things I have done:


This year's bathroom passes.  I'll spray with lysol every day, but I think it's going to keep them out of the toilet, and maybe just a little more germ-free!  Made with sparkle visors from Wal-Mart, and sparkle letter stickers from Dollar Tree.


"Ask Me" visors are for my student helpers during lessons where students need help.  I use during writers' workshop, and/or I will have my first finishers put them on to help other students during any type of lesson.  They would be great during centers, too, when you are working with small groups.  Students would know if there is something that can't wait, or they need help with their electronic equipment, they can go to the "Ask Me" student.  I'm sure you have more ideas of how to use!


My new Star of the week bag! Made with a black snap bag from the Target Dollar Spot, iron-on letters, and sparkle fabric paint.  I also painted "Mrs. Geary's Class" on back in case it gets left on a bus!


These awesome notebooks were an idea from Leslie, at Jack of All Trades!  See her tutorial here.  I made some for my co-workers and I, and next I will make some for my boys' teachers.  I think it's a great little back to school gift!  


The "Rock Star" Desk.  Hot-glued a wooden guitar from Hobby Lobby, and used sticker letters.  I'm sure they'll need replaced several times.  This desk will be used for the student with "Rockin'" behavior each day.  I'm doing a Hollywood theme in my room, and I thought it would be fun to choose a rock star at the end of every day.  Since I use tables, the desk is a novelty for students, and they love to be the one who gets to sit in it for the next day!  I announce at the end of every day, and we cheer for the student selected.


I love this little owl cover I made for my shelf!  It hides all of my personal items.  This shelf is part of the student writing center on top, but since I don't have a teacher desk this year, I needed to store some of my things below.  You can't see in the picture, but I sewed button holes on both sides, and the curtain is resting on some hooked magnets  (metal shelf), so I can open it at any time.  


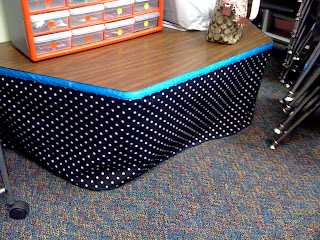
Two more sewing projects -  skirts for a table and projector cart.  I sewed ribbon around the top to make it cuter. :)

Now I have to get busy with my walls.  I have a goal to be organized by Wednesday.  I'm not sure if I'll make it, but I'm sure going to try!